CRAFTING THE PERFECT FIT
Richie Braces® are fabricated from a model of patients’ feet with an impression cast with either plaster splints or an STS casting sock. Alternatively, digital casting can now be utilized. We have provided resources below which demonstrate all options for impression and/or digital casting.
Casting with precision is essential for a proper patient fit. No matter which of the three accepted casting methods you choose (plaster splints, STS socks, digital scanning with iPad Structure Sensor), we have the training tools to assist you.
PLASTER CASTING VIDEO TUTORIAL
PLASTER CASTING STEP-BY-STEP
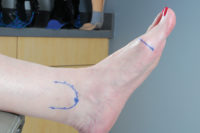
- Foot held 90° dorsiflexed
- Mark foot according to printed instructions
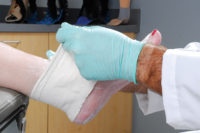
- Apply plaster strip #1
- Form a slipper cast with splint #2
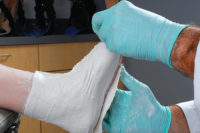
- Complete with splint #3 and lay over the tip of the toes
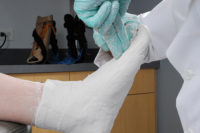
- Lock midtarsal joint and plantarflex the first metatarsal
- Remove cast following proper guidelines
STS SOCK CASTING VIDEO TUTORIAL
STS SOCK CASTING STEP-BY-STEP
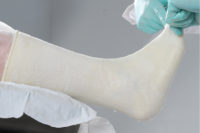
- Lay cutting strip down
- Lay down cutting channel
- Place plastic bag over foot and leg
- Apply STS sock following instructions carefully

- Mold sock
- Lock midtarsal joint and plantarflex the first metatarsal
CLINICAL PEARL:
CASTING & FOREFOOT SUPINATUS
CLINICAL PEARL:
CAST QUALITY
DIGITAL CASTING OVERVIEW
DIGITAL CASTING FOR RICHIE
GAUNTLETS, CALIFORNIA AFO, SOLID AFO, & BALANCE BRACE
DIGITAL CASTING TUTORIAL
PATIENT POSITIONING TUTORIAL:
SUPINE
PATIENT POSITIONING TUTORIAL:
PRONE
